Domain
▶ What authorization code is needed for domain push?
▶ How can I renew my domain?
- Sign in to your Namecheap account
- Click on your username - it will be on the black bar located at the top of the page
- Click on Manage Domains
- Click on the domain name you wish to renew
- Find Add More Years to Domain option in the left side menu
- Select the number of years you wish to renew your domain for and proceed with the checkout
▶ How can I renew my expired domain?
- Sign in to your Namecheap account
- Click on your username - it will be on the black bar located at the top of the page
- Go to Manage Domains
- Choose Reactivate Domains from the left side menu
- Select the domain, click on Add To Cart button and proceed with checkout
Hosting
▶ Internal Protection “.htaccess” (Manual setup)
▶ WordPress Optimization
▶ More about file permissions
- Read - Files with read access can be only read by the user.
- Write - Files with write access can be edited by the user.
- Execute - Files with execute access can be executed as programs by the user.
- User - The owner of the file.
- Group - Other files which are in the same folder or group.
- World - Anyone else.
▶ How to restore cPanel backups in addon domains. Partial site restoration
This tutorial will cover the information on how to manually restore full cpanel backup (sites, databases and emails). It will help you to protect your data and will allow you to merge/separate few cPanel accounts.
Unfortunately full cPanel backups can not be restored automatically from cPanel interface, however you can upload the backup to your Home directory and submit a ticket to Hosting—Support department to have it restored by our technical team.
*note: this will overwrite all the current files.
There is no automated way to separate/merge few cPanel accounts or to restore the partial backups. So you might need to restore them manually and below you will find an easy step by step example with the general tips to do so.
Legend:
domain.com – the primary domain associated with your cPanel account
addon.com –the domain added as addon into the same cPanel account
domain.com has a Prestashop (popular e-commerce engine) installed on it and Wordpress (blog engine) on addon.com
Let’s take a look at the situation where you have a full cpanel backup on PC.
Upload the backup-4.4.2014_domain.tar.gz to your home folder via FTP , select the file, right click on it and choose ‘Extract’ or click on corresponding button on the top bar.
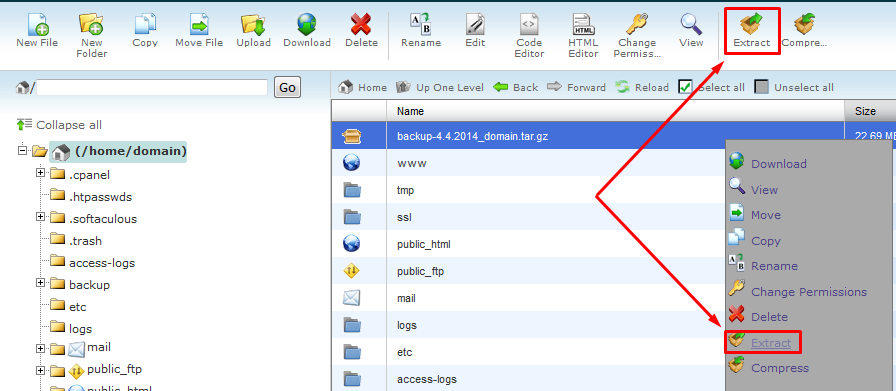
On the next pop-up window you will be able to specify the path to restore the archive to, but let’s leave it empty and just click on Extract files. You will see the Extraction results table with the list of the restored files, just close it.
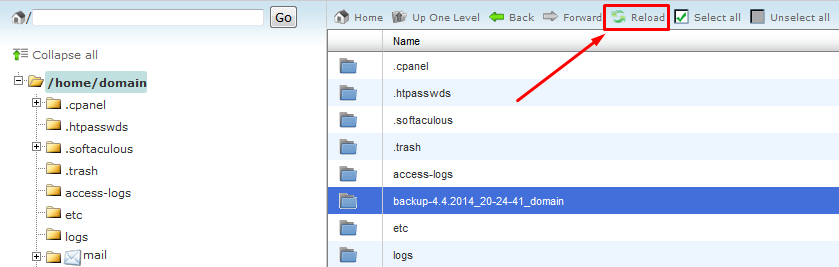
Now click on the Reload button on the top and you will see the newly created backup folder “backup-4.4.2014_20-24-21_domain”, lets open it.
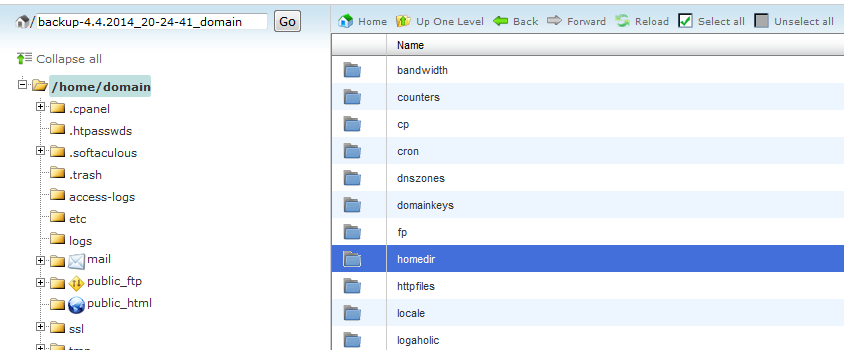
There will be many different folders. Find the homedir, open it, there you will find your home folder.
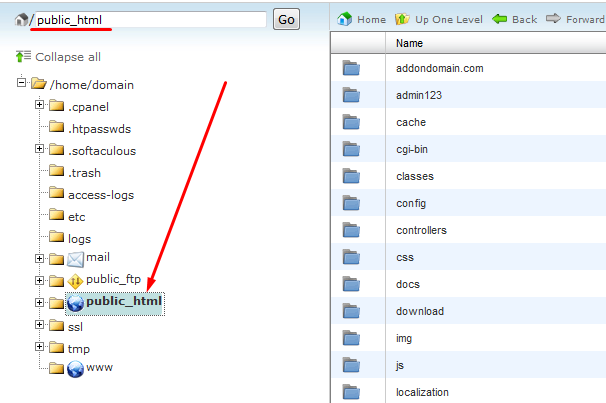
Next, open public_html folder

It is the document root (folder with files) for the domain.com so it contains all Prestashop files. Also there is a folder addon.com , which is the document root for addon.com domain , with Wordpress files.
So we can just copy everything to our public_html folder (which is currently empty).
Click on the Select all, right click and choose Copy
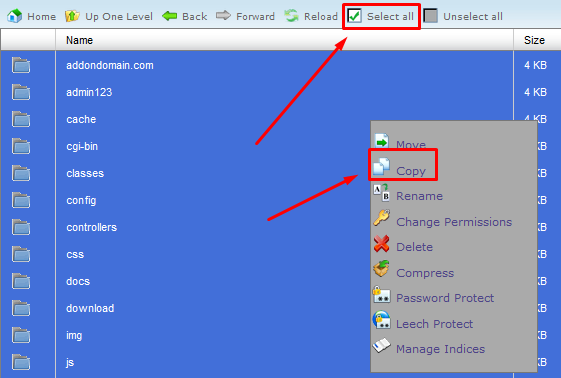
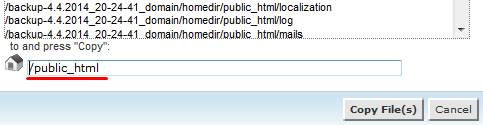
On the pop-up window enter /public_html and click on Copy files button
Now you can check the public_html folder, all the files should be already there.
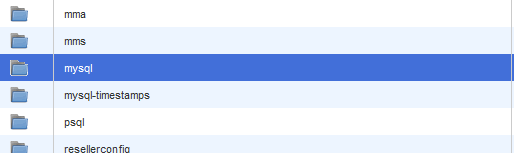
Now let’s get back to the /backup-4.4.2014_20-24-41_domain folder as we need to restore the databases as well.
Find the folder mysql and open it
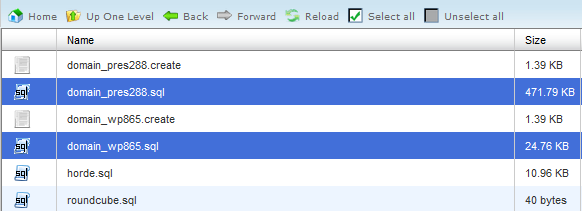
You will see some .sql files. These are backups of your mysql databases. They will be named respectively to your domain name. Hereinafter we will use domain_pres288.sql (Prestashop database) and domain_wp865.sql (Wordpress database) as examples. Let’s right click on them (one per time) and download to our PC.
Now we need to restore them. There are 2 ways to do this:
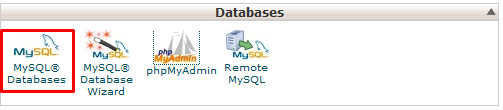
- from Cpanel > Backups menu

Choose the previously downloaded .sql file on your PC and click Upload.
Then you will need to create database user and add the user to the database in Cpanel> Mysql databases menu. (you can use the same database user and password or create new)
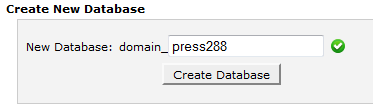
Create database:
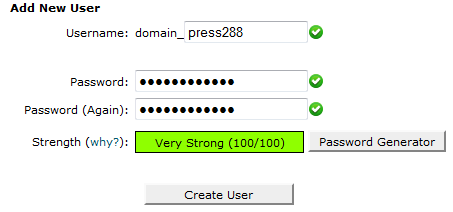
Create database user with some password (save the password , we will need it later)
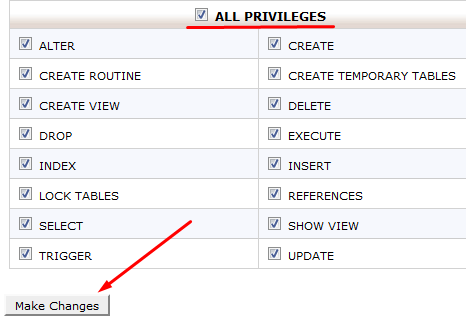
And add the user to the database, on the pop-up windows check the option All Privileges and click on save changes.
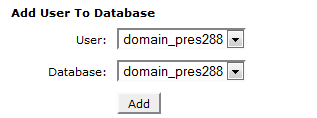
if everything is correct you will be able to see your newly create database with assigned user.

If you need more detailed information, please refer to thisguide.
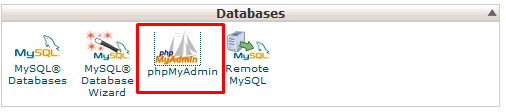
- from Cpanel>Phpmyadmin menu
At first you need to create the database, database user and password in cPanel > MySQL Databases menu.
We have already created the database , user , password and added the user to the database but it is still empty.
Now open Cpanel> phpMyadmin menu
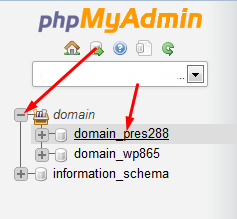
Click on the “+” on the left of the cPanel username and click on the database name
Click on import on the right top bar and browse to the corresponding .sql file on your PC (here domain_pres288.sql)
and browse to the corresponding .sql file on your PC (here domain_pres288.sql)
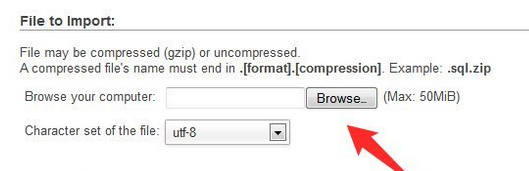
Scroll down and click ‘Go’ to start the import.
You will see a green notification that your database was successfully imported.
If you need more detailed information, please refer to this guide.
3. Database configuration files
We are almost done. The last step is to update the configuration files of Wordrpess and Prestashop with the correct database details.
Open the restored public_html folder and browse to the addon.com folder, find the wordpress wp-config.php file , which contains database details , select it, right click and choose edit.
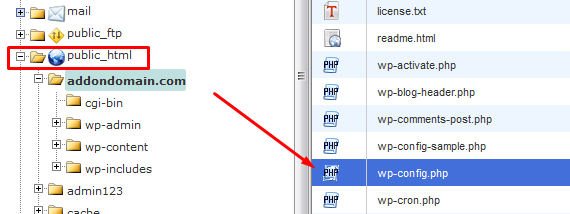
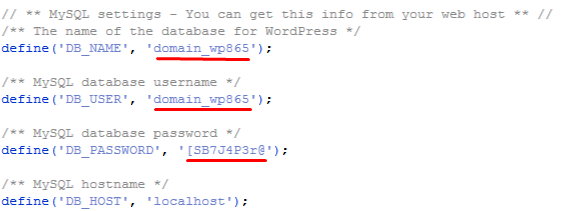
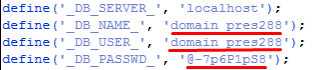
Find the following 4 lines and make sure they have valid data (database name, user and password), change the characters inside quotes if needed and save the file.
That’s all for Wordpress, now it’s needed to perform the similar changes with Prestashop.
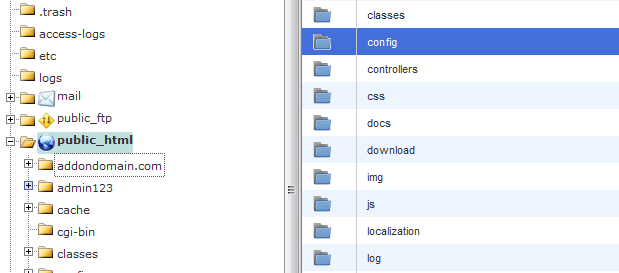
Browse back to the public_html folder and find the config folder
Open it , select the settings.inc.php (Prestashop config file with database details) file, right click on it and choose edit.
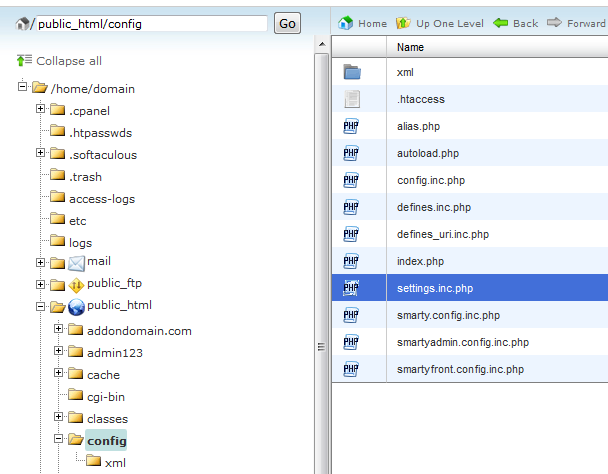
Find the following 4 lines and make sure that they have valid data. Similar to what we did to wp-config.php file.
That’s it. If your domain is already pointed to the hosting server you will be able to open domain.com or addon.com in browser and see Wordpress/Prestashop up and running.
In case you had some important emails, you are able to restore them from full cpanel backup as well.
For example , we had an email account contact@domain.com with some emails and occasionally deleted it. But we have a full Cpanel backup or Home folder backup .
First, it is necessary to recreate the same mailbox from Cpanel> Email accounts menu. You may refer to this article http://www.namecheap.com/support/knowledgebase/article.aspx/110/
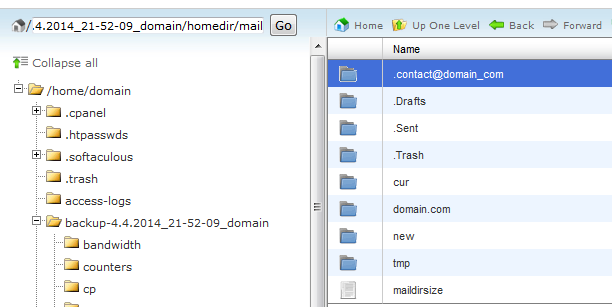
Now, browse to the backup folder >> homedir folderand open the mail folder.
See the .contact@domain_com folder ? It contains all our folders with emails.
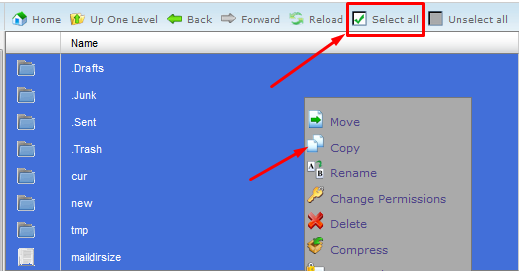
Open it, click the select all button and click Copy
Then on the pop-up windows put the following path /mail/.contact@domain_com and click Copy files .
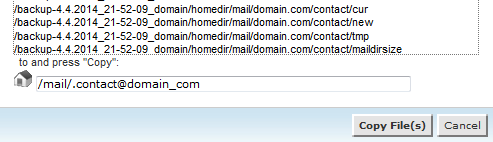
That’s all, check your emails via webmail or email client.
Config files and folders may vary from one hosting provider/script template to another but the main points remain the same. If you can’t find the corresponding files or not sure what details to put - feel free to contact us via live chat or ticket using our helpdesk .▶ Google malicious content – hints on how to remove it
Why was my site blacklisted by Google?
Unfortunately, the majority of blacklisted web-sites are in reality legitimate websites into which hackers have inserted a malicious content. Here are some popular reasons:
1) Your HTML or PHP code was hacked;
2) The redirects to harmful and infected sites were inserted through iframes or JavaScript;
3) Flash .swf files were added to your web-site.
What is Malware?
It is a malicious software that is specifically created to gain access or damage a computer without the knowledge of the owner. Viruses, worms, and Trojan horses are examples of malicious software that are often grouped together and referred to as malware. Malware can open the access to your personal information, such as passwords and credit card numbers or alter your search results without your knowledge.
How to fix the issue:
Below are some suggestions on ways to resolve this issue if it is happening to your site:
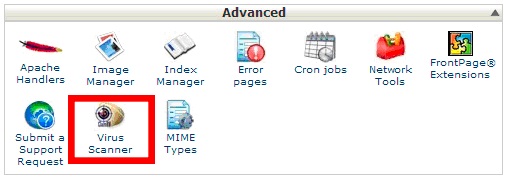
1) Scan and remove the malicious content from your site. You can use a Virus Scanner option in cPanel or contact our Live Chatteam for a help.
2)Scan your PC;
3) Register and verify your site in Google’s free Webmaster Tools.
4) Sign into Webmaster Tools and check the Security Issues section to see details of sample URLs that may be infected;
5) Find the cause of the security issue and fix it. Otherwise, your site is likely to be reinfected.
6) Request a review in the Security Issues section in Webmaster Tools when your entire site is clean and secure. Once Google determines your site is fixed, they will remove the malware label.▶ Do you provide SEO services?
▶ How to clear the local DNS cache in Windows
▶ How can I push a domain from one account to another?
- Sign in to your Namecheap account
- Mouse over your username at the top of the page
- Click on Manage Domains
- Click on the domain name you would like to push. If you need to push several domains, tick check boxes near the domains and click Edit Selected below
- Click on Push Domain To User on the left-side navigation bar
knowledge
▶ How to prevent your hosting account from being hacked
 Another important aspect is a cPanel username.
By default in a hosting welcome guide you receive a generated username which consist of a part of your main domain name in complex with several random letters. cPanel username can be changed only by our representatives per your request in chat or ticket. There are some restrictions triggered by cPanel functionality. Your username can consist only of alphanumeric characters (digits are also permitted, however they are not permitted as the first symbol in the username). Also cPanel username cannot be longer than eight symbols. It is not recommended to change it to your actual name or nickname as this information can be obtained easily by any other person.
2. Change your password regularly
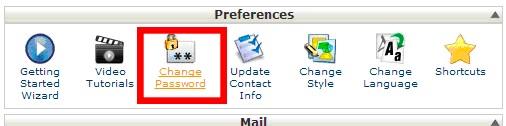
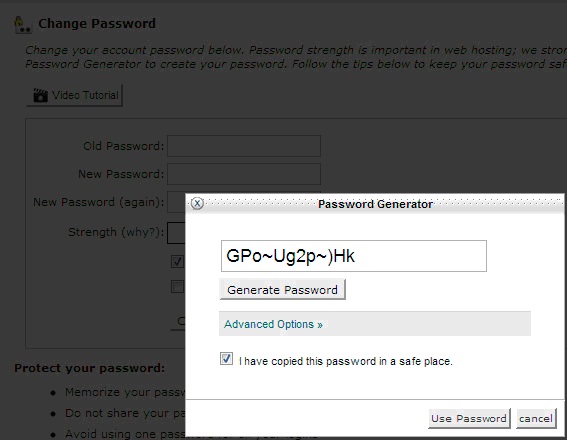
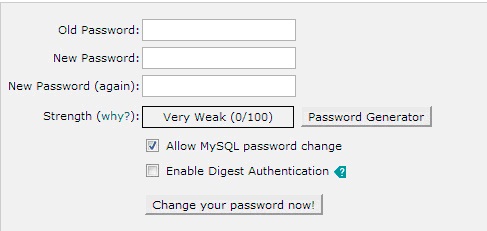
It is strongly recommended to change your password from time to time. Also we advise changing the password right after receiving a hosting welcome guide e-mail. cPanel password can be changed in cPanel -> Change Password. By the way, we recommend checking «Allow MySQL password change» as this option lets you synchronize the password with the password for phpMyAdmin.
Another important aspect is a cPanel username.
By default in a hosting welcome guide you receive a generated username which consist of a part of your main domain name in complex with several random letters. cPanel username can be changed only by our representatives per your request in chat or ticket. There are some restrictions triggered by cPanel functionality. Your username can consist only of alphanumeric characters (digits are also permitted, however they are not permitted as the first symbol in the username). Also cPanel username cannot be longer than eight symbols. It is not recommended to change it to your actual name or nickname as this information can be obtained easily by any other person.
2. Change your password regularly
It is strongly recommended to change your password from time to time. Also we advise changing the password right after receiving a hosting welcome guide e-mail. cPanel password can be changed in cPanel -> Change Password. By the way, we recommend checking «Allow MySQL password change» as this option lets you synchronize the password with the password for phpMyAdmin.
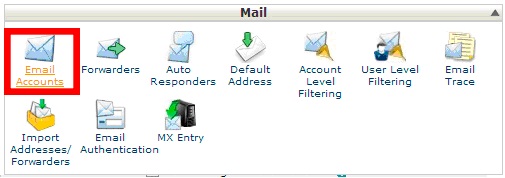
 Additionally, it makes sense to change passwords for your e-mail accounts as well. This can be done in cPanel -> E-mail Accounts.
 3. Keep your username and password in a safe place.
For example, avoid keeping your hosting welcome guide in the inbox of an e-mail account in case you are not the only person who has access to it. Also, please, avoid storing your cPanel login details in a text file on your desktop especially if you are not the only user of this computer. You can use roboform, lastpass or any other similar password saving software in that case.
Needless to say it is not recommended to share your username and password with anyone.
4. Pay attention to security of your computer.
It is strongly recommended to have an effective firewall and antivirus software with the up-to-date databases on your personal computer. Please, perform a full scan of your computer from time to time. Some viruses are intended to steal your login details and transmit them to someone who needs them. Also there are special applications which are known as keyloggers. They gather a log of keyboard buttons pressed by you, make screenshots of your desktop and send this information to a hacker. Such software can be detected by a good antivirus program so do not forget to check your PC regularly.
5. Use a secured connection when it is possible
For example, with Namecheap you can connect by FTP in two ways. You can use a conventional port 21 or you can connect using a non-standard secured port 21098. If there are no network restrictions then it is recommended to use port 21098. Also, it is better to access your cPanel using non-standard port 2083 instead of standard port 80. A link which looks like http://cpanel.yourdomain.com uses port 80. If you wish to use port 2083 then, please, use link which looks like https://yourdomain.com:2083
6. Scan your webspace
To avoid having the files located in your hosting account being at hazard it is recommended to use different means of scanning for malicious software. First of all you can use an in-built cPanel virus scanner.
3. Keep your username and password in a safe place.
For example, avoid keeping your hosting welcome guide in the inbox of an e-mail account in case you are not the only person who has access to it. Also, please, avoid storing your cPanel login details in a text file on your desktop especially if you are not the only user of this computer. You can use roboform, lastpass or any other similar password saving software in that case.
Needless to say it is not recommended to share your username and password with anyone.
4. Pay attention to security of your computer.
It is strongly recommended to have an effective firewall and antivirus software with the up-to-date databases on your personal computer. Please, perform a full scan of your computer from time to time. Some viruses are intended to steal your login details and transmit them to someone who needs them. Also there are special applications which are known as keyloggers. They gather a log of keyboard buttons pressed by you, make screenshots of your desktop and send this information to a hacker. Such software can be detected by a good antivirus program so do not forget to check your PC regularly.
5. Use a secured connection when it is possible
For example, with Namecheap you can connect by FTP in two ways. You can use a conventional port 21 or you can connect using a non-standard secured port 21098. If there are no network restrictions then it is recommended to use port 21098. Also, it is better to access your cPanel using non-standard port 2083 instead of standard port 80. A link which looks like http://cpanel.yourdomain.com uses port 80. If you wish to use port 2083 then, please, use link which looks like https://yourdomain.com:2083
6. Scan your webspace
To avoid having the files located in your hosting account being at hazard it is recommended to use different means of scanning for malicious software. First of all you can use an in-built cPanel virus scanner.
 Also you can use some free online scanners such as this:
http://sitecheck.sucuri.net/scanner/
It is better to combine these two ways of checking your account for viruses. In order to prevent having viruses and malware on your account it is recommended to use themes and plugins only from trusted providers. In case you have any suspects regarding your account’s security then, please, feel free to contact our Support Team at any moment.
7. Always have a backup.
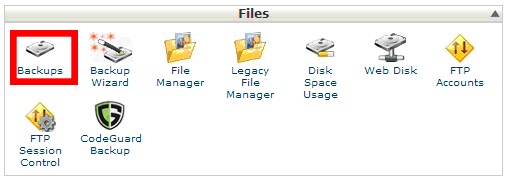
Even though backups are scheduled on a weekly basis on our shared servers it is recommended to keep a backup of your account somewhere in a safe place on your PC or third party server. Please do not forget to update it from time to time in order to avoid losing the important information. You can create a full cPanel backup in cPanel -> Backups. Please be informed that if your account gets bigger than 10GB or contains more than 150 000 inodes then it will be automatically excluded from weekly backups.
Also you can use some free online scanners such as this:
http://sitecheck.sucuri.net/scanner/
It is better to combine these two ways of checking your account for viruses. In order to prevent having viruses and malware on your account it is recommended to use themes and plugins only from trusted providers. In case you have any suspects regarding your account’s security then, please, feel free to contact our Support Team at any moment.
7. Always have a backup.
Even though backups are scheduled on a weekly basis on our shared servers it is recommended to keep a backup of your account somewhere in a safe place on your PC or third party server. Please do not forget to update it from time to time in order to avoid losing the important information. You can create a full cPanel backup in cPanel -> Backups. Please be informed that if your account gets bigger than 10GB or contains more than 150 000 inodes then it will be automatically excluded from weekly backups.
 Even more advanced and convenient solution for creating backups is CodeGuard (later, CG). It’s main advantage is the possibility of creating *automatized* backups of your site. Using CG you can partially completely restore your site if there any changes arose, which you wish to get rid of. As CG is fully integrated in your cPanel, only several clicks are required for you to start taking advantages of this great feature we have!
8. Enable CloudFlare.
We recommend you enabling CloudFlare in your cPanel. It is a great solution which improves your account’s performance and security. It can help you in protecting your account against DDoS attacks, SQL injections and other similar threats.
You can find more information in our guide “How to enable CloudFlare for your domain name”.
Update all third party scripts to the latest versions (e.g. Joomla!, WordPress, Magentoo or any other CMS)
Don't load your website with every script, theme, gadget, feature, function, and code snippet you can find on the web. Each of them could let a hacker into your site. Before you use something new, read its vulnerability report.
9. CMS security tips.
If your site is build on Wordpress we recommend you to read our Wordpress security guides:
CMS Security Issues. WordPress Security and Optimization
Internal Protection “.htaccess” (Manual setup)
and use the security tips listed there to prevent hack attempts in the future.
Following these simple recommendations you can improve your account’s security greatly. From our side we do our best to keep your account safe but if you undertake these measures a level of security increases drastically. We recommend our clients not to ignore the safety of data and always feel free to contact our Support Team in case you have any questions or complications.
Even more advanced and convenient solution for creating backups is CodeGuard (later, CG). It’s main advantage is the possibility of creating *automatized* backups of your site. Using CG you can partially completely restore your site if there any changes arose, which you wish to get rid of. As CG is fully integrated in your cPanel, only several clicks are required for you to start taking advantages of this great feature we have!
8. Enable CloudFlare.
We recommend you enabling CloudFlare in your cPanel. It is a great solution which improves your account’s performance and security. It can help you in protecting your account against DDoS attacks, SQL injections and other similar threats.
You can find more information in our guide “How to enable CloudFlare for your domain name”.
Update all third party scripts to the latest versions (e.g. Joomla!, WordPress, Magentoo or any other CMS)
Don't load your website with every script, theme, gadget, feature, function, and code snippet you can find on the web. Each of them could let a hacker into your site. Before you use something new, read its vulnerability report.
9. CMS security tips.
If your site is build on Wordpress we recommend you to read our Wordpress security guides:
CMS Security Issues. WordPress Security and Optimization
Internal Protection “.htaccess” (Manual setup)
and use the security tips listed there to prevent hack attempts in the future.
Following these simple recommendations you can improve your account’s security greatly. From our side we do our best to keep your account safe but if you undertake these measures a level of security increases drastically. We recommend our clients not to ignore the safety of data and always feel free to contact our Support Team in case you have any questions or complications.
bkash Mobile Number01815916102
Acc Name: Md. Rashedul Alam Acc No: 0081020023285

Acc Name: VC World Acc No: 20501670100241311 Swift Code: IBBLBDDH167

email: vcworldgroup@gmail.com
![]()